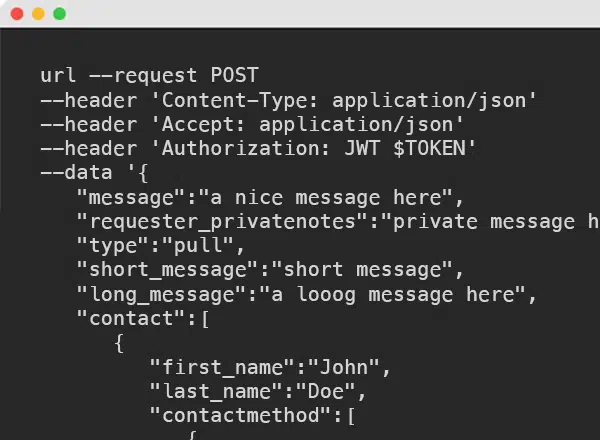
Hello Developers!
This tutorial is in order to send your first requests using the version 1.0 of Sandbox BotDoc API. In order to use this version, you have to put “v1” on the API’s endpoint.
To a better understanding about the versioning, please go to api.botdoc.io/documentation/#versioning
and to a better understanding about the Sandbox, please go to api.botdoc.io/documentation/#sandbox-platform
1. The first thing you need to understand is every request MUST have a token:
Thus, no matter what endpoint, you always need to pass the token on the header that looks like the following:
Authorization: JWT your-token-here
2. Sending your first request to an email:
In order to create a request you have to make a request to:
https://sandboxapi.botdoc.io/v1/auth/request/ as POST and passing a json as data:
e.g.
{
	"message": "a nice message here",
	"requestor_privatenotes": "your internal notes here",
	"is_sending": false,
	"long_message_subject": "the subject email here",
	"long_message": "the body email message here",
	"contact": [{
		"first_name": "John",
		"last_name": "Doe",
		"contactmethod": [{
			"interface_class": "email",
			"value": "someone@email.com"
		}]
	}]
}
That’s the basics you need to know to send an email request to your customer.
The message field is the message that your customer will see when he/she opens the BotDoc’s page to send or download the file(s).
The requestor_privatenotes is an optional field that you can create some internal notes that only you can see.
The is_sending is a field to send or request file(s) from your customer. False when you are requesting file(s) or True when you are sending files.
The long_message_subject is an optional field if you want to override the default subject.
The long_message is an optional field if you want to override the default body message.
The contact field is a little bit more complex. In this case above, you are creating a new contact and sending the request to that email.
Sending this request you will receive a response that looks like the example below:
{
	"id": 9874564,
	"identifier": "b5f751c751d32d39xxxxxxxxxxxxxxxxxxx",
	"message": "a nice message here",
	"receiver_message": null,
	"requestor_privatenotes": "your internal notes here",
	"is_sending": false,
	"long_message_subject": "the subject email here",
	"long_message": "the body email message here. https://sandboxapi.botdoc.io/r/b5f751c751d32d39xxxxxxxxxxxxxxxxxxx/",
	"requestor_notified": false,
	"is_draft": false,
	"complete": false,
	"short_message": "short message. https://sandboxapi.botdoc.io/r/b5f751c751d32d39xxxxxxxxxxxxxxxxxxx/",
	"contact_notification_send": [],
	"contact": [{
		"id": 74453,
		"first_name": "John",
		"last_name": "Doe",
		"contactmethod": [{
			"id": 64547,
			"interface_class": "email",
			"value": "someone@email.com",
			"created": "2018-01-25T18:20:02Z",
			"updated": "2018-01-25T18:20:02Z"
		}],
		"created": "2018-01-25T18:20:02Z",
		"updated": "2018-01-25T18:20:02Z"
	}],
	"media": [],
	"callback_url": null,
	"created": "2018-01-25T18:20:02.007141Z",
	"updated": "2018-01-25T18:20:02.007141Z"
}
As you can see, you will get the request id, the contact id and contactmethod id and all data you just sent as well.
Now your request was created, but the customer wasn’t notified yet.
3. Send the notification:
In order to send a notification you have to make a request to:
https://sandboxapi.botdoc.io/v1/auth/request/{request-id}/send_notification as GET:
You can expect a response http code 200 if the notification was sent successfully.
4. Sending your first request to a mobile phone:
In order to create a request sending to a mobile phone you have to use the same endpoint, and the data just changes a little:
e.g.
{
	"message": "a nice message here",
	"requestor_privatenotes": "your internal notes here",
	"is_sending": false,
	"short_message": "your sms message here",
	"contact": [{
		"first_name": "John",
		"last_name": "Doe",
		"contactmethod": [{
			"interface_class": "sms",
			"value": "+18185554709"
		}]
	}]
}
That’s the basics you need to know to send an sms request to your customer.
The short_message is an optional field if you want to override the default sms message.
On contact field, we just changed the interface_class from email to sms and the value field expects an E.164 format.
E.164 is the international telephone numbering plan that ensures a unique number.
Examples:
| Country | Country Code | Telephone Number | E.164 |
| US | 1 | (818) 555-4709 | +18185554709 |
| GB | 44 | (207) 183-8750 | +442071838750 |
| BR | 55 | (11) 5525-6325 | +551155256325 |
You can expect the same example of response as sending to an email.
5. Create a request to send file(s):
In the example above you were requesting to retrieve file(s), but now you are going to send file(s)!
In order to create a request to send file(s) you have to use the same endpoint as requesting file(s) and the data just changes a little:
Change the is_sending to True and put your files on the field media. Everything else is the same as requesting files.
e.g.
{
	"is_sending": true,
	"media": [{
		"file": "the-binary",
		"name": "image.png",
		"content_type": "image/png",
		"bytes": 46558,
		"extension": "png"
	}]
}
The file is the binary
The name is the file name
The content_type is the MIME type, also know as “media type” and “content type”.
The extension is the extension of the file
The bytes is the file size
And you’ll get the response similar as requesting files, but with the media field with media’s id and its data without the content/binary.
e.g.
{
	"id": 4599,
	"is_sending": true,
	...
	"media": [{
			"id": 959595,
			"request": 4599,
			"name": "image.png",
			"content_type": "image/png",
			"bytes": 71693,
			"extension": "png",
			"created": "2018-01-24T19:25:50Z",
			"updated": "2018-01-24T19:25:50Z"
		},
		{
			"id": 959596,
			"request": 4599,
			"name": "business_plan.docx",
			"content_type": "application/vnd.openxmlformats-officedocument.wordprocessingml.document",
			"bytes": 15091,
			"extension": "docx",
			"created": "2018-01-24T19:25:52Z",
			"updated": "2018-01-24T19:25:52Z"
		}
	]
}
6. Webhook callback:
When you are creating a request you can also add a field callback_url with your URL to be called as soon the user interacts with your request.
Your URL will be called with a POST of the Request Object
e.g.
{
	...
	"callback_url": "http://your-domain.com/botdoc_callback_url",
}
7. Adding files to your requests:
When you create a request with is_draft = true, you can create media and assign to this request.
Thus, you don’t need to send the media inside the Request endpoint, you can create the request and then upload each.
Also there are 2 ways to do so:
- you can send one endpoint request with the entire file size
- you can send multiple requests with multiple chunks of 4mb
For Example:
We are going to add 2 files of 10gb each:
The first one is going to be a single request to upload the entire 10gb file:
https://sandboxapi.botdoc.io/v1/media/ as POST:
curl --request POST
--header 'Content-Type: application/json'
--header 'Accept: application/json'
--header 'Authorization: JWT poiujmnhyytbbbvdaswdxhlkjwetgp'
--data '{
  "request": 65265,
  "content_type": "image/png",
  "name": "photo.png",
  "file": "the full binary file here"
}'
 'https://api.botdoc.io/v1/media/'
The only extra field here is request, which is the request ID, and it’s required.
Everything else is the same as we did on the 5th step.
The another way to upload a file is splitting a file in multiple chunks of 4mb
In this case, you have to send 2500 requests, the first one being a POST to the same endpoint:
curl --request POST
--header 'Content-Type: application/json'
--header 'Accept: application/json'
--header 'Authorization: JWT poiujmnhyytbbbvdaswdxhlkjwetgp'
--data '{
  "request": 65265,
  "content_type": "image/png",
  "name": "photo.png",
  "file": "the first of 1/2500 of the binary file here",
  "total_chunks": 2500
}'
 'https://api.botdoc.io/v1/media/'
The difference here is the total_chunks, which is the amount of chunks you are going to send.
But why 2500? Since the total file size is 10gb, and we split 2500 files to 4mb each.
You can split in 4mb or less, but not more than 4mb.
Now you have sent the first 4mb chunk, you received the media id, you can send the 2499 requests remaining as PUT:
Thus, https://sandboxapi.botdoc.io/v1/media/<media_id> as PUT:
curl --request PUT
--header 'Content-Type: application/json'
--header 'Accept: application/json'
--header 'Authorization: JWT poiujmnhyytbbbvdaswdxhlkjwetgp'
--data '{
  "file": "the 95/2500 of the binary file here"
  "current_chunk": 95,
}'
 'https://api.botdoc.io/v1/media/'
The media_id is set on the URL, and there are only 2 fields as data.
The file is the split binary
The current_chunk is current chunk. Starting with the second chunk, since the first you already sent and it does not start count with zero
When you send your last chunk, it will generate the media automatically.
Now you know how to create requests to request and send files!
For more details about creating a request you can take a look at our BotDoc API Reference on api.botdoc.io/documentation/#create-request


